Starting My New Project

Today I’m starting a new project. This is my very first logo that will be used as a business logo and not simply for a web-page.

I started off with the name, and did some research (looking up images of both of the creatures used in the logo to decide best how to merge them and did a series of sketches)

It took about an hour to find the right one. A detailed piece, but not too detailed, Cute but still professional enough to be taken seriously.

For the logo we have decided three colors and with a complete sketch it will be time to take it digital.

I will first start by uploading it to adobe Illustrator and pen-tooling the image and then it can be uploaded into photo-shop and filled with color.

Once we have taken it to photo-shop we will create three mock-ups each testing out a new color scheme for the client.

Once we have sent over the images and a color scheme is picked the image will be sized and the project completed.

New Skills in Photoshop

The other day I was doing a project for a client and he wanted a large order of color changes for his logo. Usually I eyeball the image and use the Hue/Saturation tool and merge layers, but he wanted an exact pallet and there were many color changes so I hit the internet. It wasn’t long before a video tutorial popped up about the color replacement tool.

The color replacement tool is a tool that allows you to select the original color and the color you would like to change the image into by using a brush and brushing it on.

A complication that I ran into at first was that tool was replacing the main color and applying grey instead of the desired color onto the logo.

To fix this problem I discovered that when applying the tool, the setting on the top left needs to be set to color and then the tool can be applied. Problem solved!

Another thing to watch out for when applying the tool is to make sure that all of the edges are covered. An easy way to do this is to change the background color and anything that isn’t the desired color will show up.

It’s a fairly simple, but effective tool that can be used in numerous ways. For example you can change the output from color to luminosity and you can end up with some wild color changes. Different patters such as stripes and spray paint patterns can be applied if one were to play with the output settings and then brush on the colors for the desired effect.

Painting Pottery

I got into painting pottery this summer of 2019.

It all started about a year ago, when my mother and I were out for coffee. We passed by the pottery shop, and I remember passing by the building and thinking it was the coolest thing.

Flash Forward: my mother and I were searching for a new hobby and I recalled the paint shop from about a year ago. We had searched the internet vigorously looking for the shop, and until now had only found a paint auto-body shop and a paint department store. We decided it was best to simply drive around looking for the place instead so we drove around the area for a while. Our first venture out we couldn’t remember exactly where it was or it’s name, we only remembered that it was in Menifee and that it was by both an Ono Hawaiian food restaurant and a Starbucks.

The next day my mother and I were pretty determined to find this place so we started looking up alternative search results and finally we had found it! Painted Earth.

We stepped inside and the people who worked there were very friendly. they walked us through how to paint with glaze and set us up at a table.

We had such a joyous time! The idea of customizing our own pottery and painting together was such an exciting idea for both my mother and me. We have been returning ever since and our skills have dramatically improved! and that is the story of how painting pottery became one of my favorite hobbies!

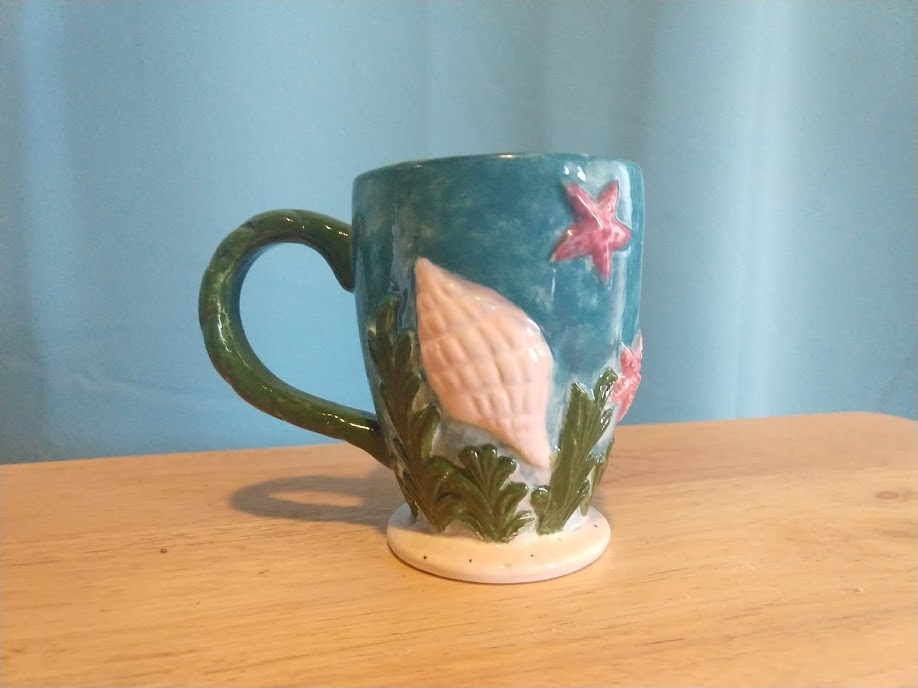
My first piece! an ocean cup complete with a sandy shore, starfish and a lovely ocean scene!